Coil Guide and Tech
Everything about coil care and technology
Learn how to dry burn, clean, and maintain your HandsMade Coils for longer life and peak performance.
Discover the precision behind our builds and keep your setup tasting perfect, every time.
A Quick Summary
- 📏 Spaced vs Classic Coils: Spaced coils are easier to dry burn, cool faster, and resist shorts.
- 👓 Preparation: Slightly stretch turns, clean before heating, and avoid touching with fingers.
- 🔥 Dry Burn: Use low power (dark red glow only) for gentle oxidation and smooth taste.
- 🏳️🌈 Coil Colors: Gold → Red → Blue = ideal; gray/brown = overheated.
- ☁️ Cotton: Use long fibers, snug fit, never too tight or loose.
- 🧹 Cleaning: Burn sugars off at low temp, then rinse when cool — never when glowing.
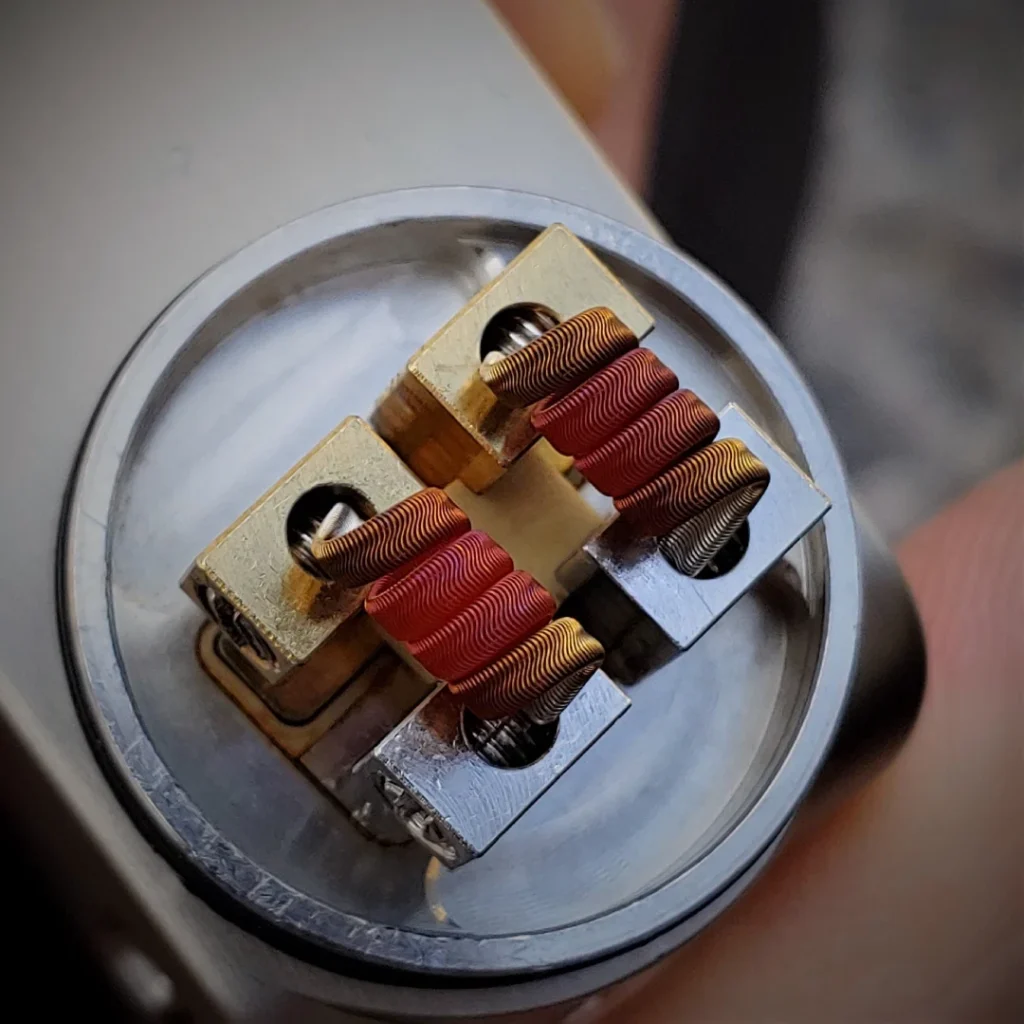
Classic Coils or Spaced?
Spaced coils are easier and faster to dry burn since turns don’t touch. They cool faster and are less prone to shorts. Taste is very similar; choose based on looks or maintenance preference.
Preparation
When installing, slightly stretch the coil turns apart for even oxidation. Avoid touching coils; wash with hot water and detergent or ultrasonic cleaner. Clean coils change color properly when heated.
Dry Burn
Use very low power—only a dark red glow. Pulse mechanical mods to avoid overheating. Gentle oxidation helps extend the lifespan of your coils. Avoid bright yellow glow; that damages the coil permanently.
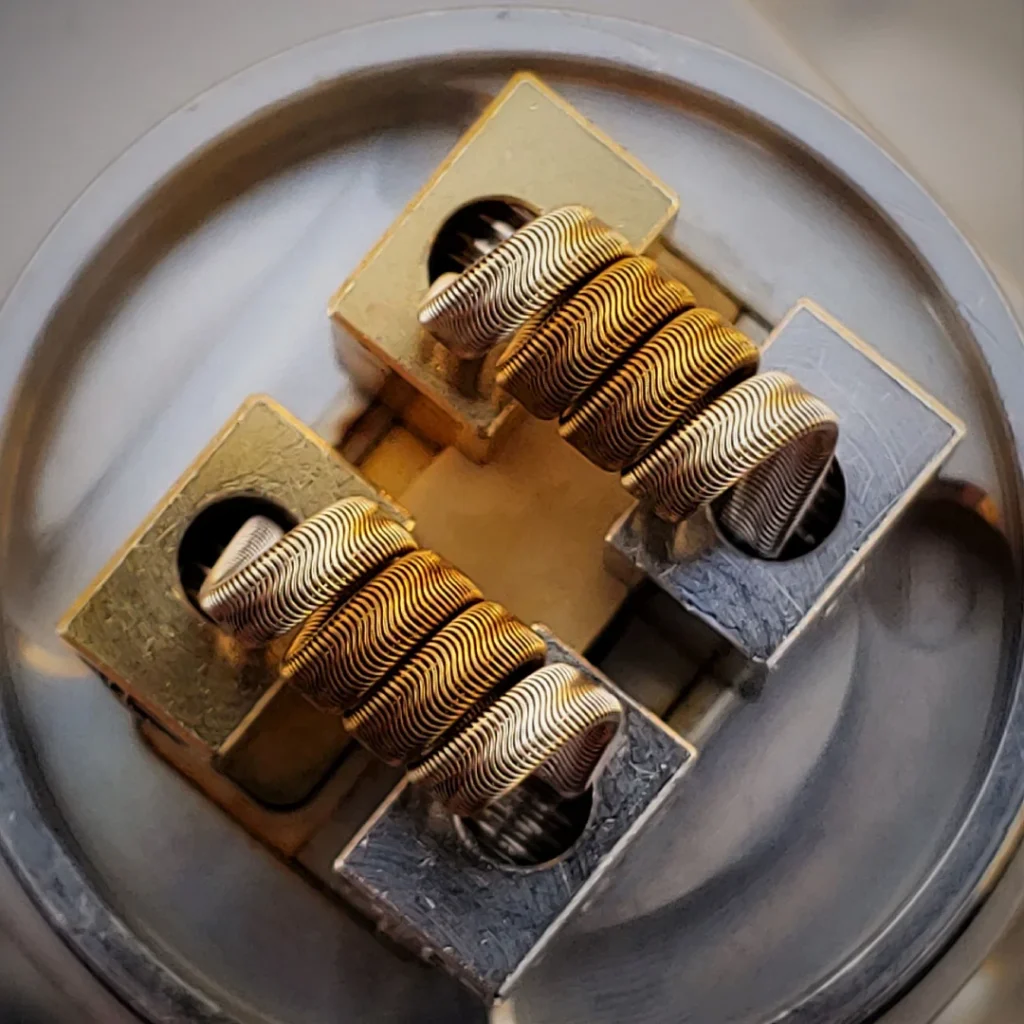
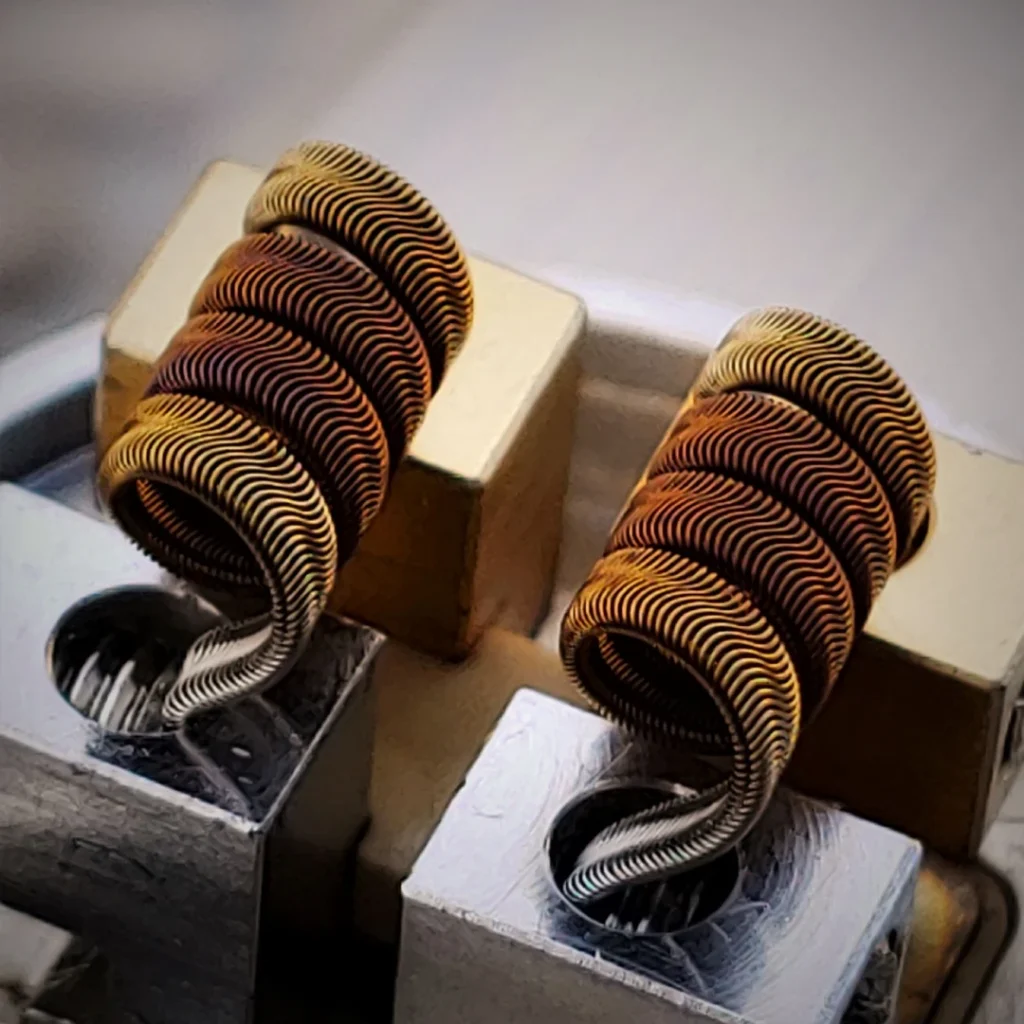
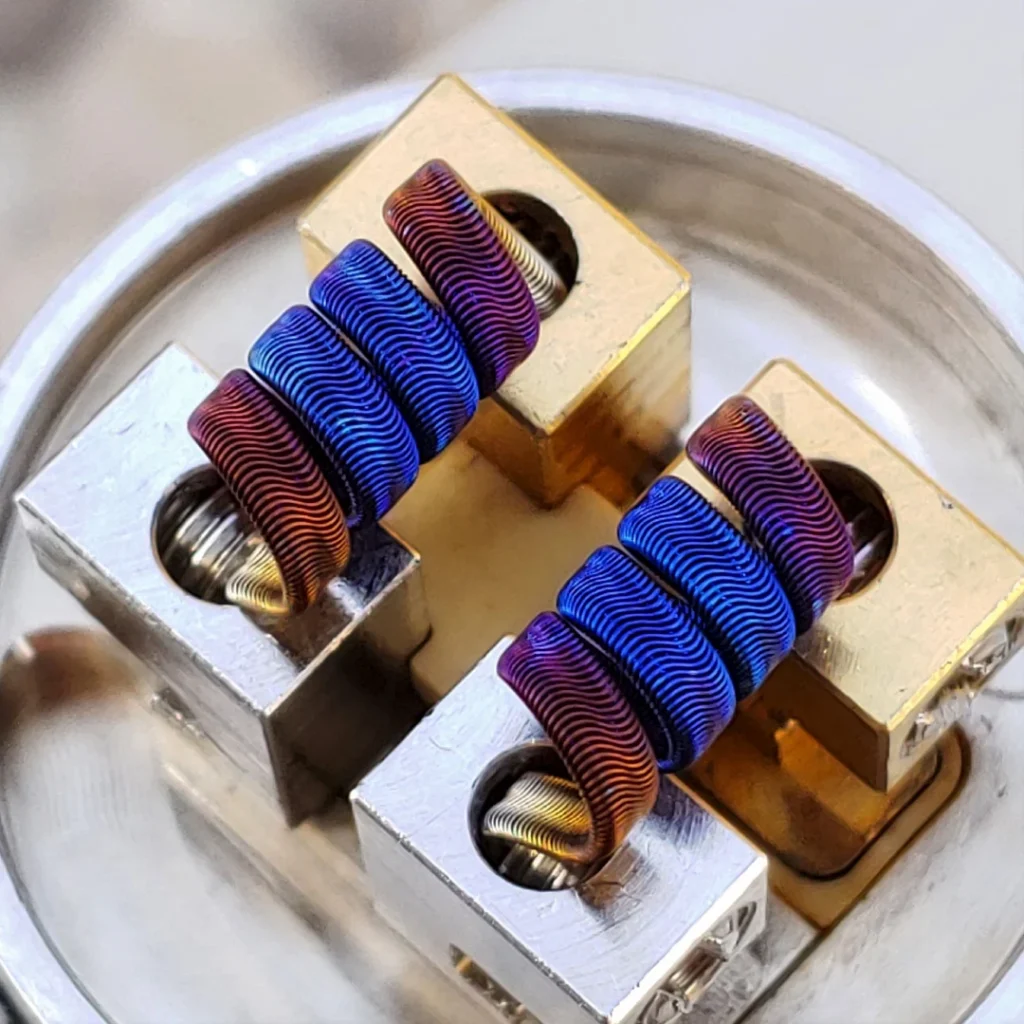
Reading Coil Colors
Correct color sequence: Gold → Red → Metallic Blue → Light Blue. Gray or brown means overheating. Fix hot spots early (gold stage). If no colors appear, the coil wasn’t clean.
Choosing the Right Cotton
Use clean, long-fiber cotton (often Japanese). It should not break or feel dusty. Pull tightly through coils but don’t deform them. Too little cotton causes dry hits; too much mutes flavor. Avoid thinning ends; cotton should stay dense and in contact with the coil.
Cleaning the Coil
Dry burn at low power to remove buildup, then rinse with water or use an ultrasonic cleaner after cooling. Never rinse while glowing hot. Lower temperature = longer coil life.
Key Takeaways
- Gentle heat = longer life.
- Spaced coils = easier maintenance.
- Clean coils & good cotton = best flavor.
- Patience during dry-burn keeps coils for longer.
Welcome to a detailed long read Coil Guide and Tech section
For vapers who want more than the basics. Here, we go deep into how to care for your coils, prevent hot spots, clean them safely, and choose the right cotton.
Whether you’re a flavor chaser or a tech perfectionist, this guide helps you get the most from your HandsMade Coils.
Dry Burn and Cleaning - Coil Care and Longevity
CLASSIC COILS OR SPACED?
With spaced coils it is easier/quicker to dry-burn the coil because the turns do not touch and you can oxidize the wire faster without getting shorts across the coil. This prevents damaging the coil too much.
They cool of a little earlier too.
The taste is similar, in my opinion.
Only dry-burn destroys the coils, too much heat during dry-burning can damage the coil, melting the metal mix and causing issues like a porous coil, rusting, and uneven heating.
Classic coils might be more visually appealing to some people.
Ultimately, the choice depends on personal preference and priorities regarding maintenance ease and aesthetics.
PREPARATION
When you install the Coils in the atomizer, please stretch the turns slightly apart, it helps to achieve more even oxidation without getting too many hot spots. Hot spots damage the vire.
The turns of the Coils installed should not touch.

Once cleaned, avoid touching them again. The grease from your fingers can burn into the coils, preventing them from changing color properly when heated.
DRY-BURN
When glowing the coil, use very low power, so low that the coil doesn’t light up beyond a dark red glow. This prevents excessive oxidation or damage to the wire.
For mechanical devices, pulse the power to avoid overheating the coil.
It’s crucial to achieve gentle oxidation with as little heat as possible. If there isn’t sufficient oxidation, tiny hot spots may develop, leading to a slightly sharp or scratchy taste in the liquid. Oxidation insulates the wire, preventing electrical shortcuts or hot spots from appearing.
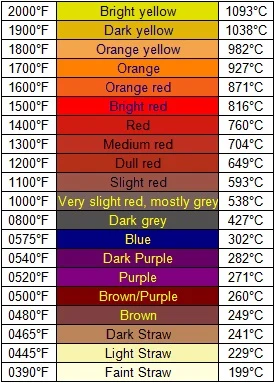
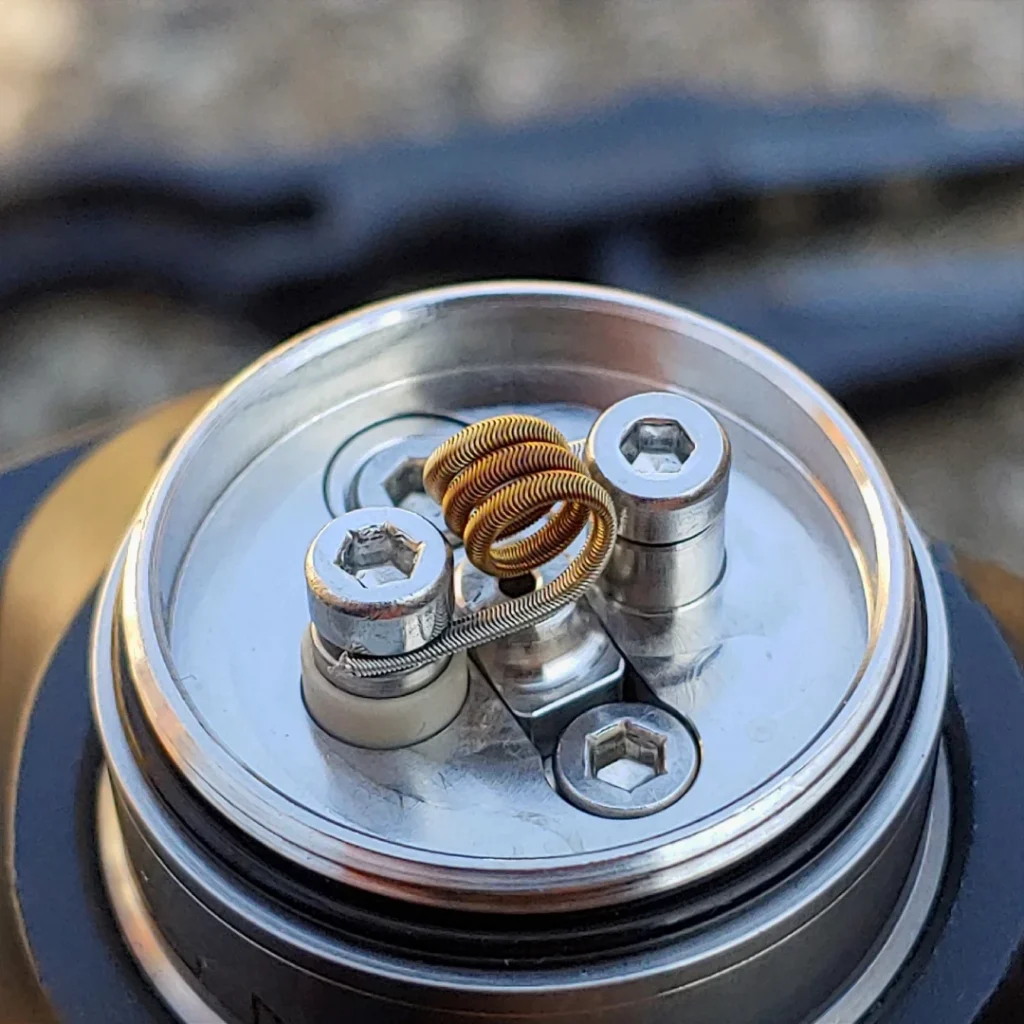
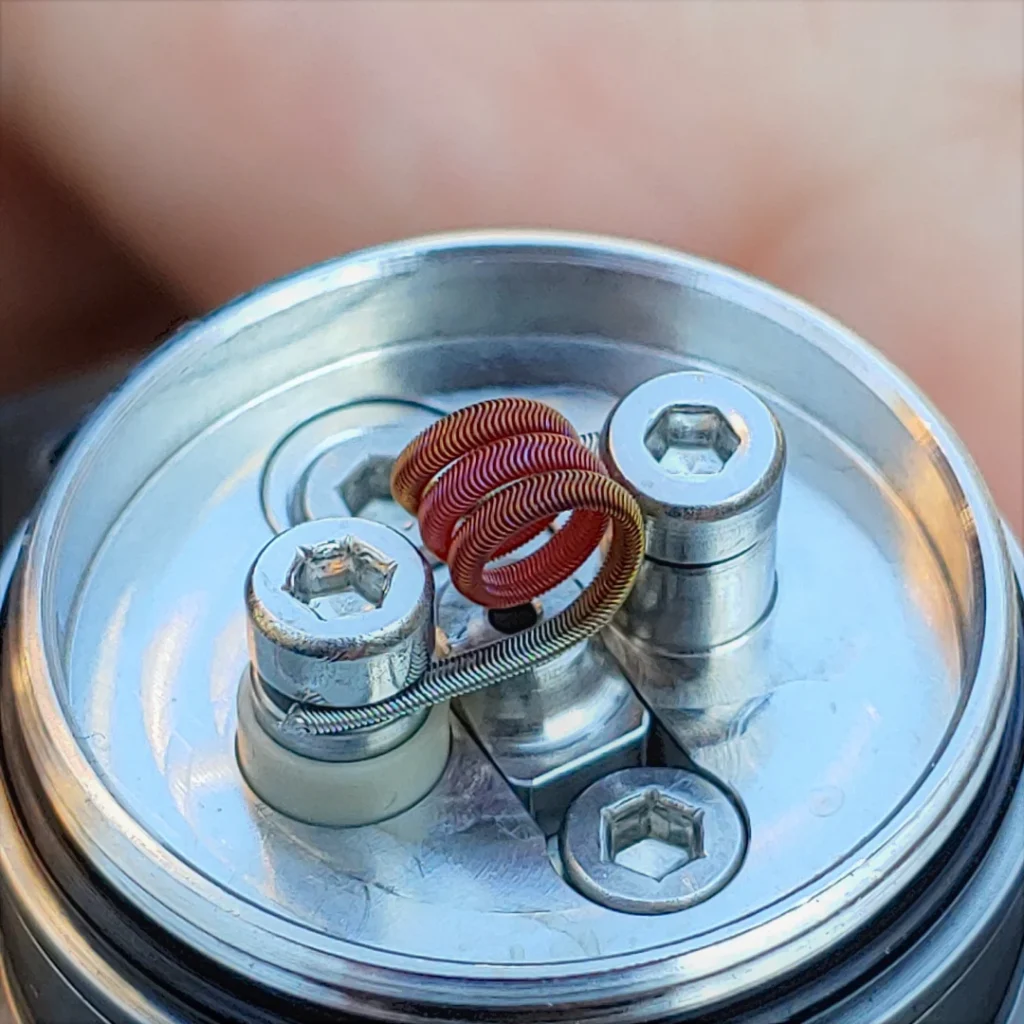
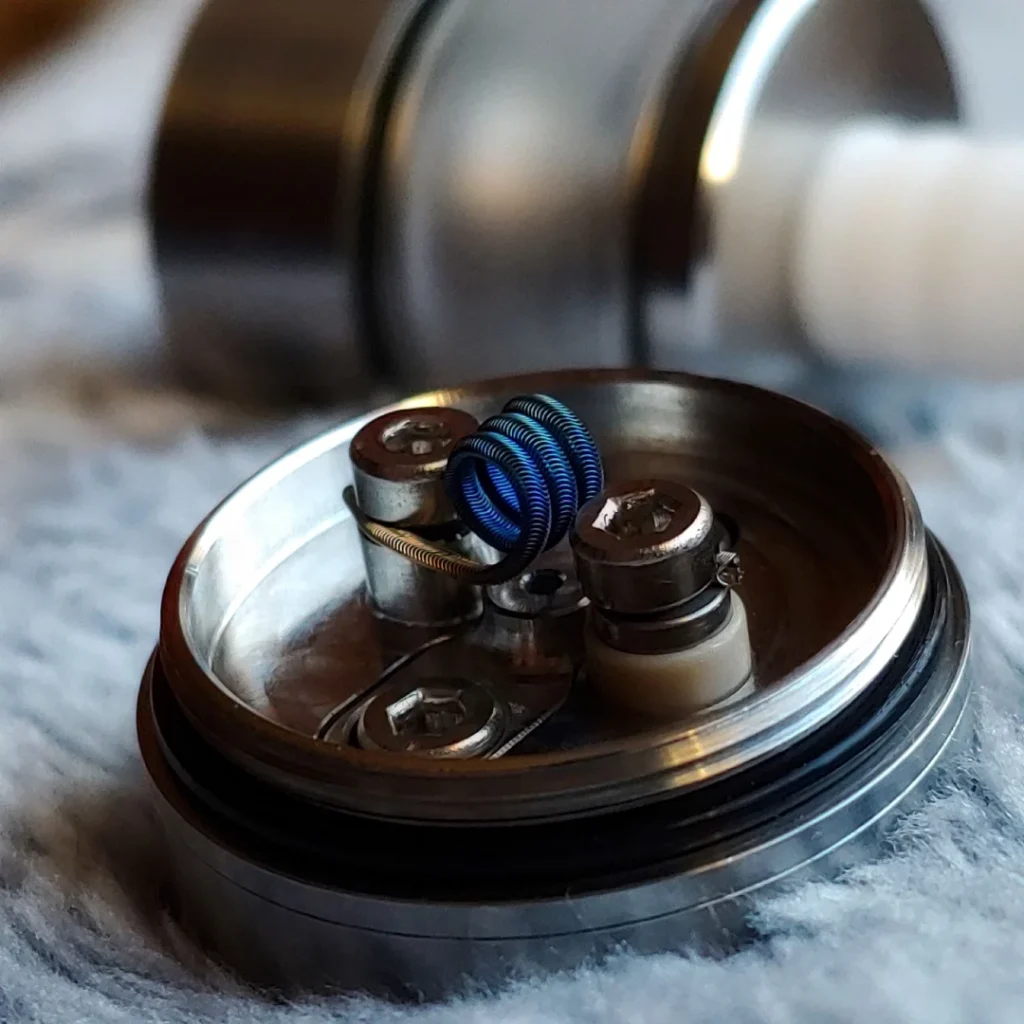
READING COIL COLORS
When heating the coil correctly, it goes through a sequence of colors: gold, red, metallic blue, and finally light blue (indicating optimal heating). If the temperature gets even higher, it may turn gray and brown, indicating rust. It’s best to resolve any hot spots when the coil is in the gold stage.
If no colors appear, it means your coil wasn’t clean during the heating process.
GLOW CHART
This is the glow chart that shows the colors of the metal corresponding to temperature.
Making the coil glow really bright yellow is too much and it permanently damages the coil. You only need to heat it up to around 300 degrees to prevent hot-spots and get enough oxidation.
Here is a short video dry burning dual coils.
DRY-BURN MTL COIL
The process is similar to what was described earlier.
Begin with the lowest power setting (5 Watts), then pulse the mod and wait for the coil to start glowing to a dark red light, but not more.
Resolve any hot spots when the coil begins to show color. Carefully pulse further until it turns dark metallic blue and later light blue, indicating optimal heating.
CHOOSING THE RIGHT COTTON
There are various cotton options available, and their quality varies. Some are good, while others are average and are comparable to cotton found in supermarkets for cheap. The key factors are cleanliness and fiber length, with the longest fibers coming from Japan. Cleanliness is crucial for taste and health.
You can check cotton quality by pulling a small amount apart; it shouldn’t break or be dusty. Longer fibers don’t collapse as much in the coil when moistened.
Pull the cotton through the coil tightly without deforming it. More cores require tighter filling, leading to denser vapor and a later dirty coil. The cotton should expand when it comes out of the coil, and the pressure inside the coil should be high.
A dry hit typically happens when there’s too little cotton in the coil, not the other way around. If there’s too much cotton, the flavor can become muted, and you might experience a dry taste.
I don’t recommend thinning out the ends, as it can absorb more liquid and pull it out of the coil incorrectly. The capillary effect pulls liquid to the higher amount, so thinned ends may not keep liquid in the coil.
As the liquid evaporates, the cotton narrows, needing to touch the coil at all times for consistent vapor, no dry hits, and a cleaner coil
CLEANING THE COIL
Clean the coil by dry-burning at very low power. Pulse the power button for an extended period to burn off sugars from the coil. Keep the temperature low (only to dark red light) to avoid damaging the coil.
After dry-burning, rinse the atomizer under running water or use an Ultrasonic cleaner once the coils are cooled down. Never put glowing coils under water, as this can instantly destroy them.
Remember, the lower the temperature, the longer the coils will last.